Staff Management
Staff Management is your central hub for managing all staff members across your beauty salon or spa. It allows you to:
Add and manage staff profiles
Assign staff to specific branches
Set up service categories for each staff member
Schedule and manage shifts
Track staff time-off requests
Monitor staff goals and performance
Manage payment methods
Control staff permissions
Navigate to Staff from your main dashboard to access the Staff Management screen.
Create New Staff


Welcome new staff members by setting up their professional profiles with WAJ. The "Create New Staff" feature in the WAJ platform allows management to add new employees to the system, complete with details like name, role, contact information, specialties, and availability. This feature is essential for onboarding new team members and ensuring they’re integrated into the scheduling and booking system smoothly.
1. Click on "New Staff"To add a new staff member to the team click on "New Staff" in the right down corner.
3. Fill in details Fill in the details of the new staff in the following form page
4. Add a personal photoYou can add a personal photo by clicking on the camera icon. This picture will show online and may also be used to help recognize staff members on the calendar.
5. Select the services your staff provides All services provided by the branch is selected by default, this can be edited by unselecting.
6. Add the phone number of the staffAdding in the phone number of the staff provides staff with access to the application, permissions and access limits can be managed within the permissions section
7. Staff descriptionType in a description of your staff and what services they provide
8. Select branchSelect which location branch they are appointed to. This is applicable for businesses that have multiple location branches
9. Manual Shifts Manual Shift allows management to manually assign shifts to staff members, providing flexibility in scheduling. This is ideal for when adjustments or special accommodations need to be made outside of the usual automated scheduling system.
10. Appoint a role to the staff11. Auto Confirm Shifts. The auto confirm shifts allow shifts for staff members to be automatically confirmed without manual intervention. This feature simplifies scheduling by removing the need for staff or management to manually approve each shift, saving time and reducing administrative tasks.
12. Click on "Add Staff"And you have created a new staff!
circle-infoNew staff members have all the service categories selected by default
circle-infoThe information you add here will be visible on the whitelabel for people to preview, make sure you add appealing information.
Re-order Staff

Re-ordering staff allows management to adjust the display order of staff members within the app. This feature is helpful for prioritizing visibility for certain team members, highlighting senior stylists or specialists, or organizing staff by role or availability. Re-ordering staff can also simplify internal navigation, helping the team quickly locate profiles or schedules based on priority or rank. This feature enhances both client experience and team organization, creating a clear, tailored staff layout that reflects the salon's structure and offerings.
Staff members can be re-order and organized by using the drag and drop feature. After the re-ordering is completed click on "Save new order" to save the new order of staff.
Manage Staff Details


Viewing staff details lets management access comprehensive profiles of each team member. This includes information like the staff member’s name, role, years of experience, specialties, services offered, and availability.
1. Click on the staffClick on the staff to open staff details.
2. Staff detailsEarning Details →
Search Staff


The "Search Staff" feature in the WAJ platform enables users to quickly locate specific team members by typing in their names. This feature is particularly useful for large businesses with multiple staff members, making it easier for clients and managers to find the right professional for their needs.
For example, a client who wants a haircut from a senior stylist can search by name to check availability, while management can use the feature to locate a staff member’s profile for scheduling or updates. By providing quick access to staff information, the "Search Staff" feature streamlines booking, enhances client convenience, and helps the salon efficiently manage and organize its team.
To search a staff members, simply click on in the search bar and type in the name of the staff member.
1. Adding a New Staff Member
Permissions Required: "Add new staff"
Steps:
Click the + Add Staff button
Fill in the required information:
Profile Photo: Upload a photo for the staff member (optional)
Staff Name: Enter the staff member's full name (required)
Phone Number: Enter contact number (optional)
If provided, a registration link will be sent to this number
About: Add a brief description or bio (optional)
Service Categories: Select which services this staff member provides (required)
Role: Choose the staff role from dropdown (required):
Staff
Receptionist
Specialist
Administrative Staff
Service Provider
Owner
Branch: Select the branch where this staff member works (required)
Payment Methods: Select payment methods this staff can accept (required)
Click Save to create the staff member
Note: Phone number is optional but highly recommended. If you provide a phone number, the staff member will receive a registration link to set up their own account.
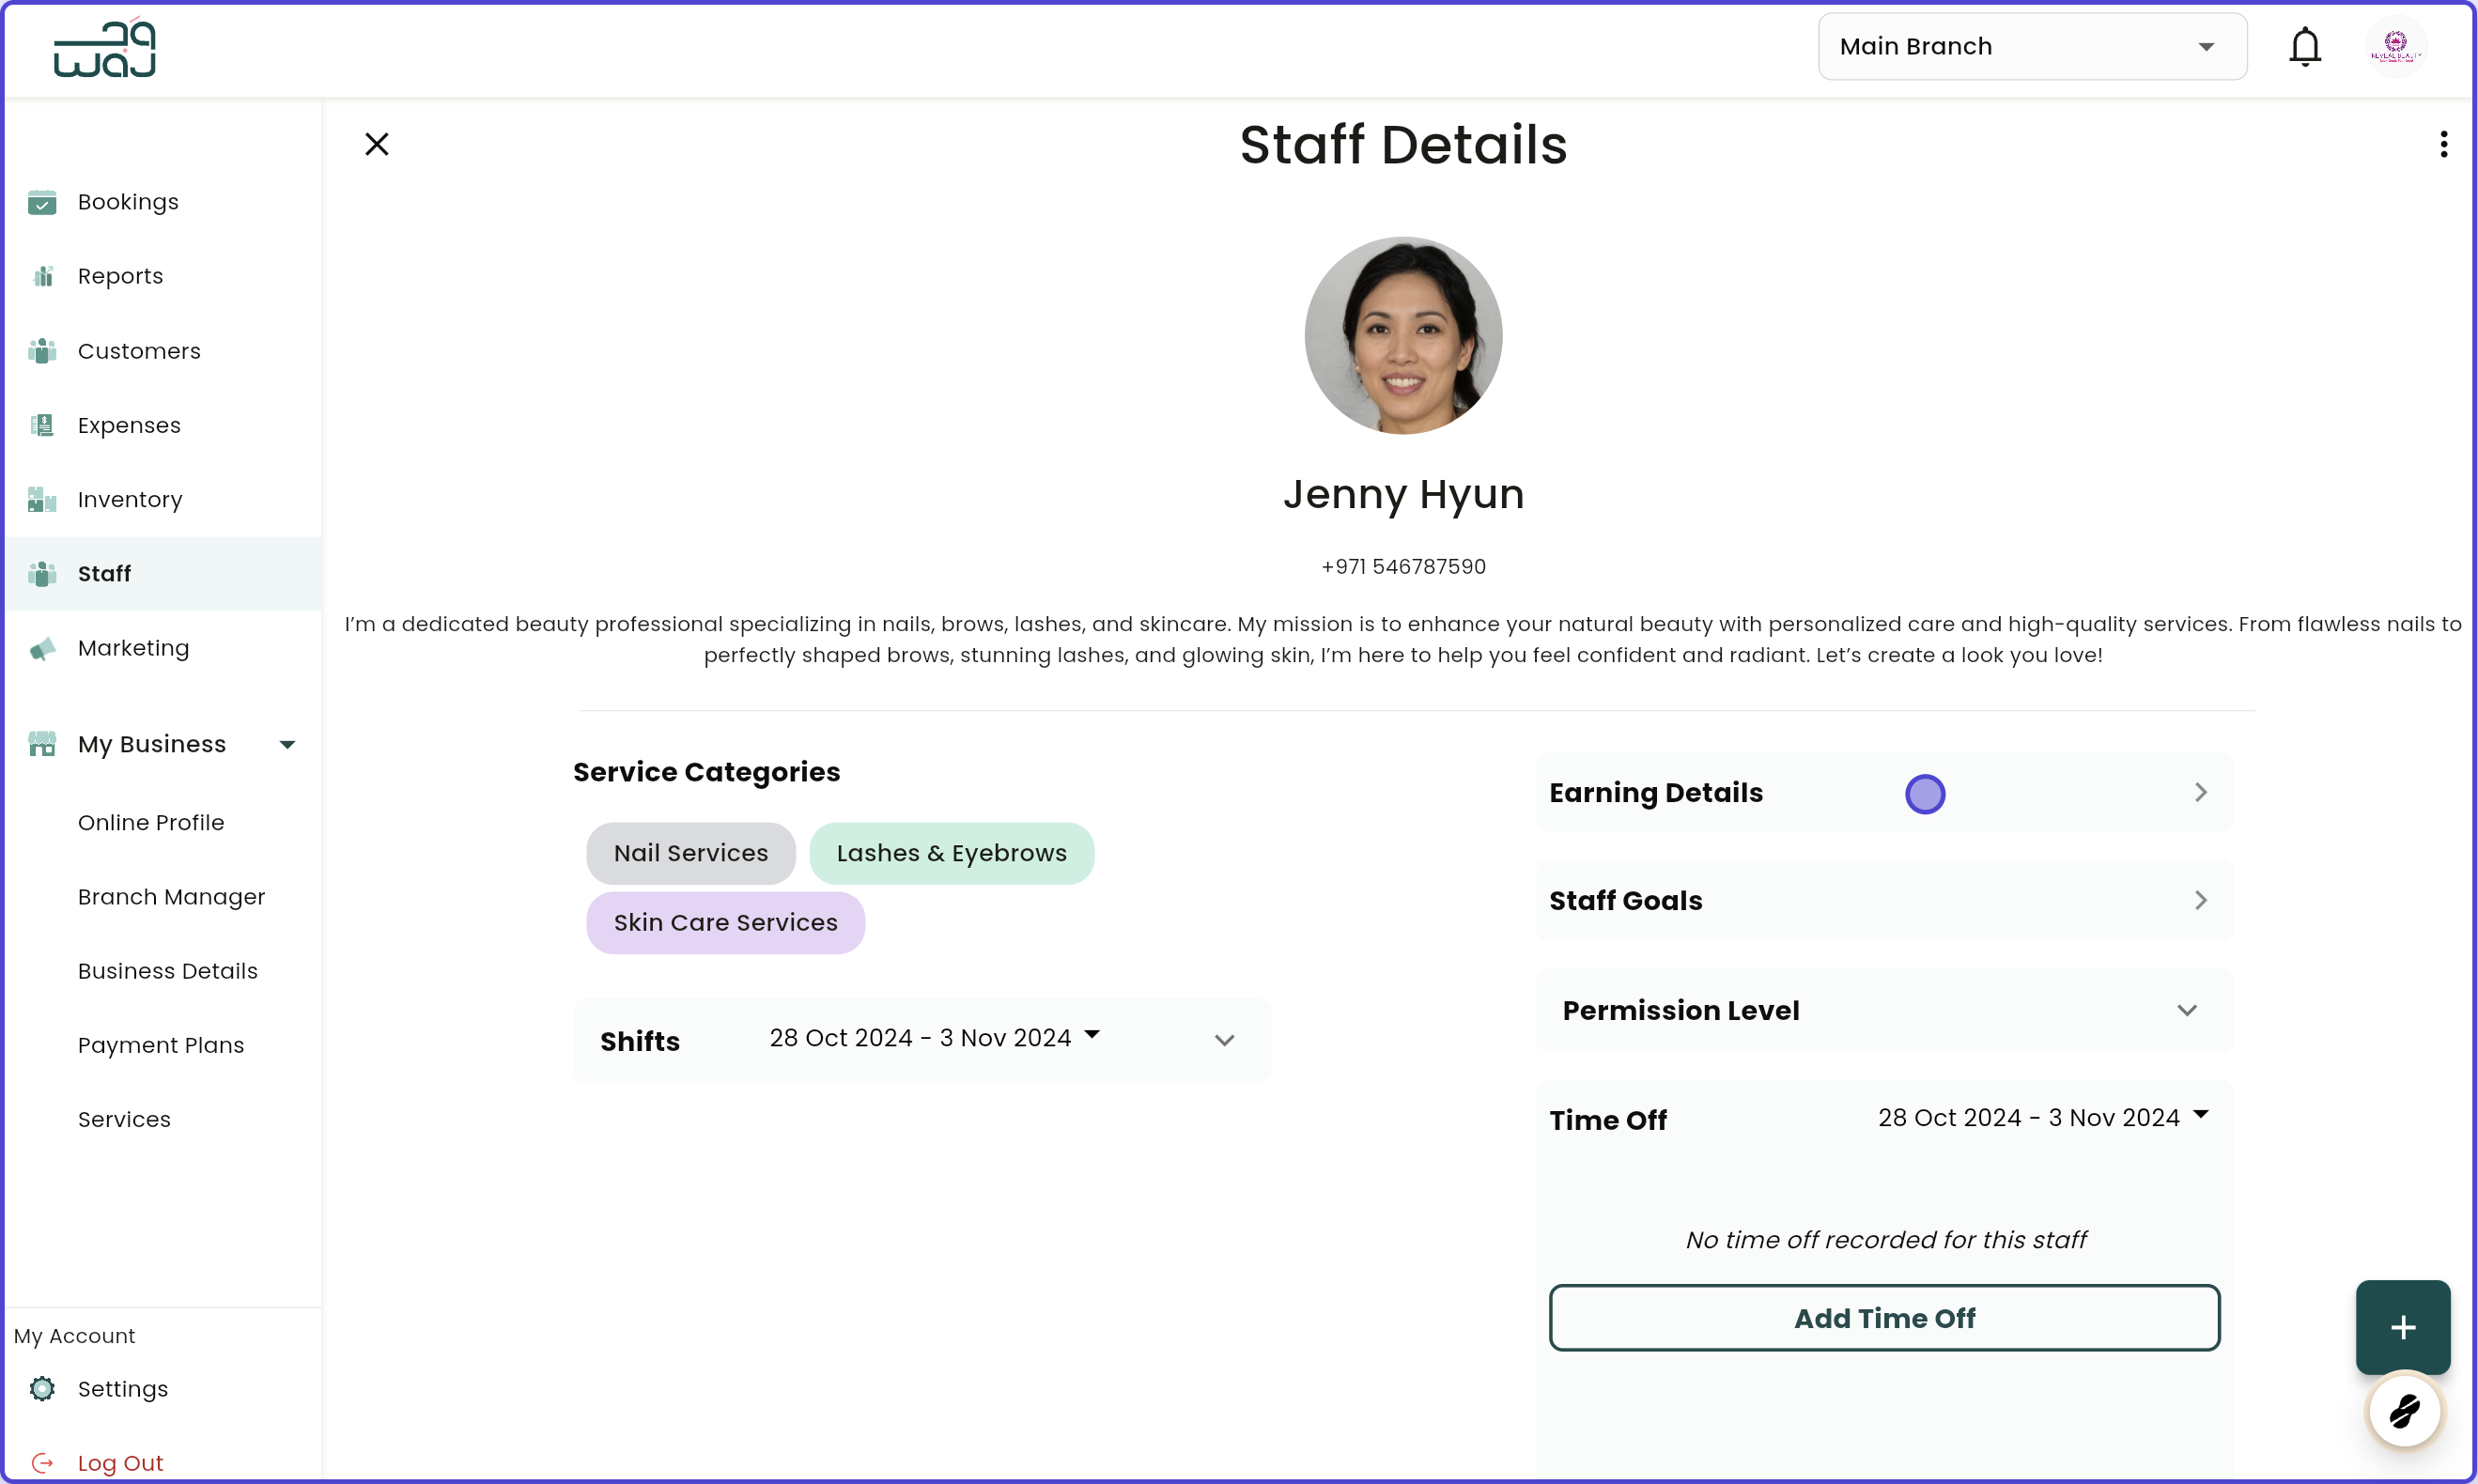
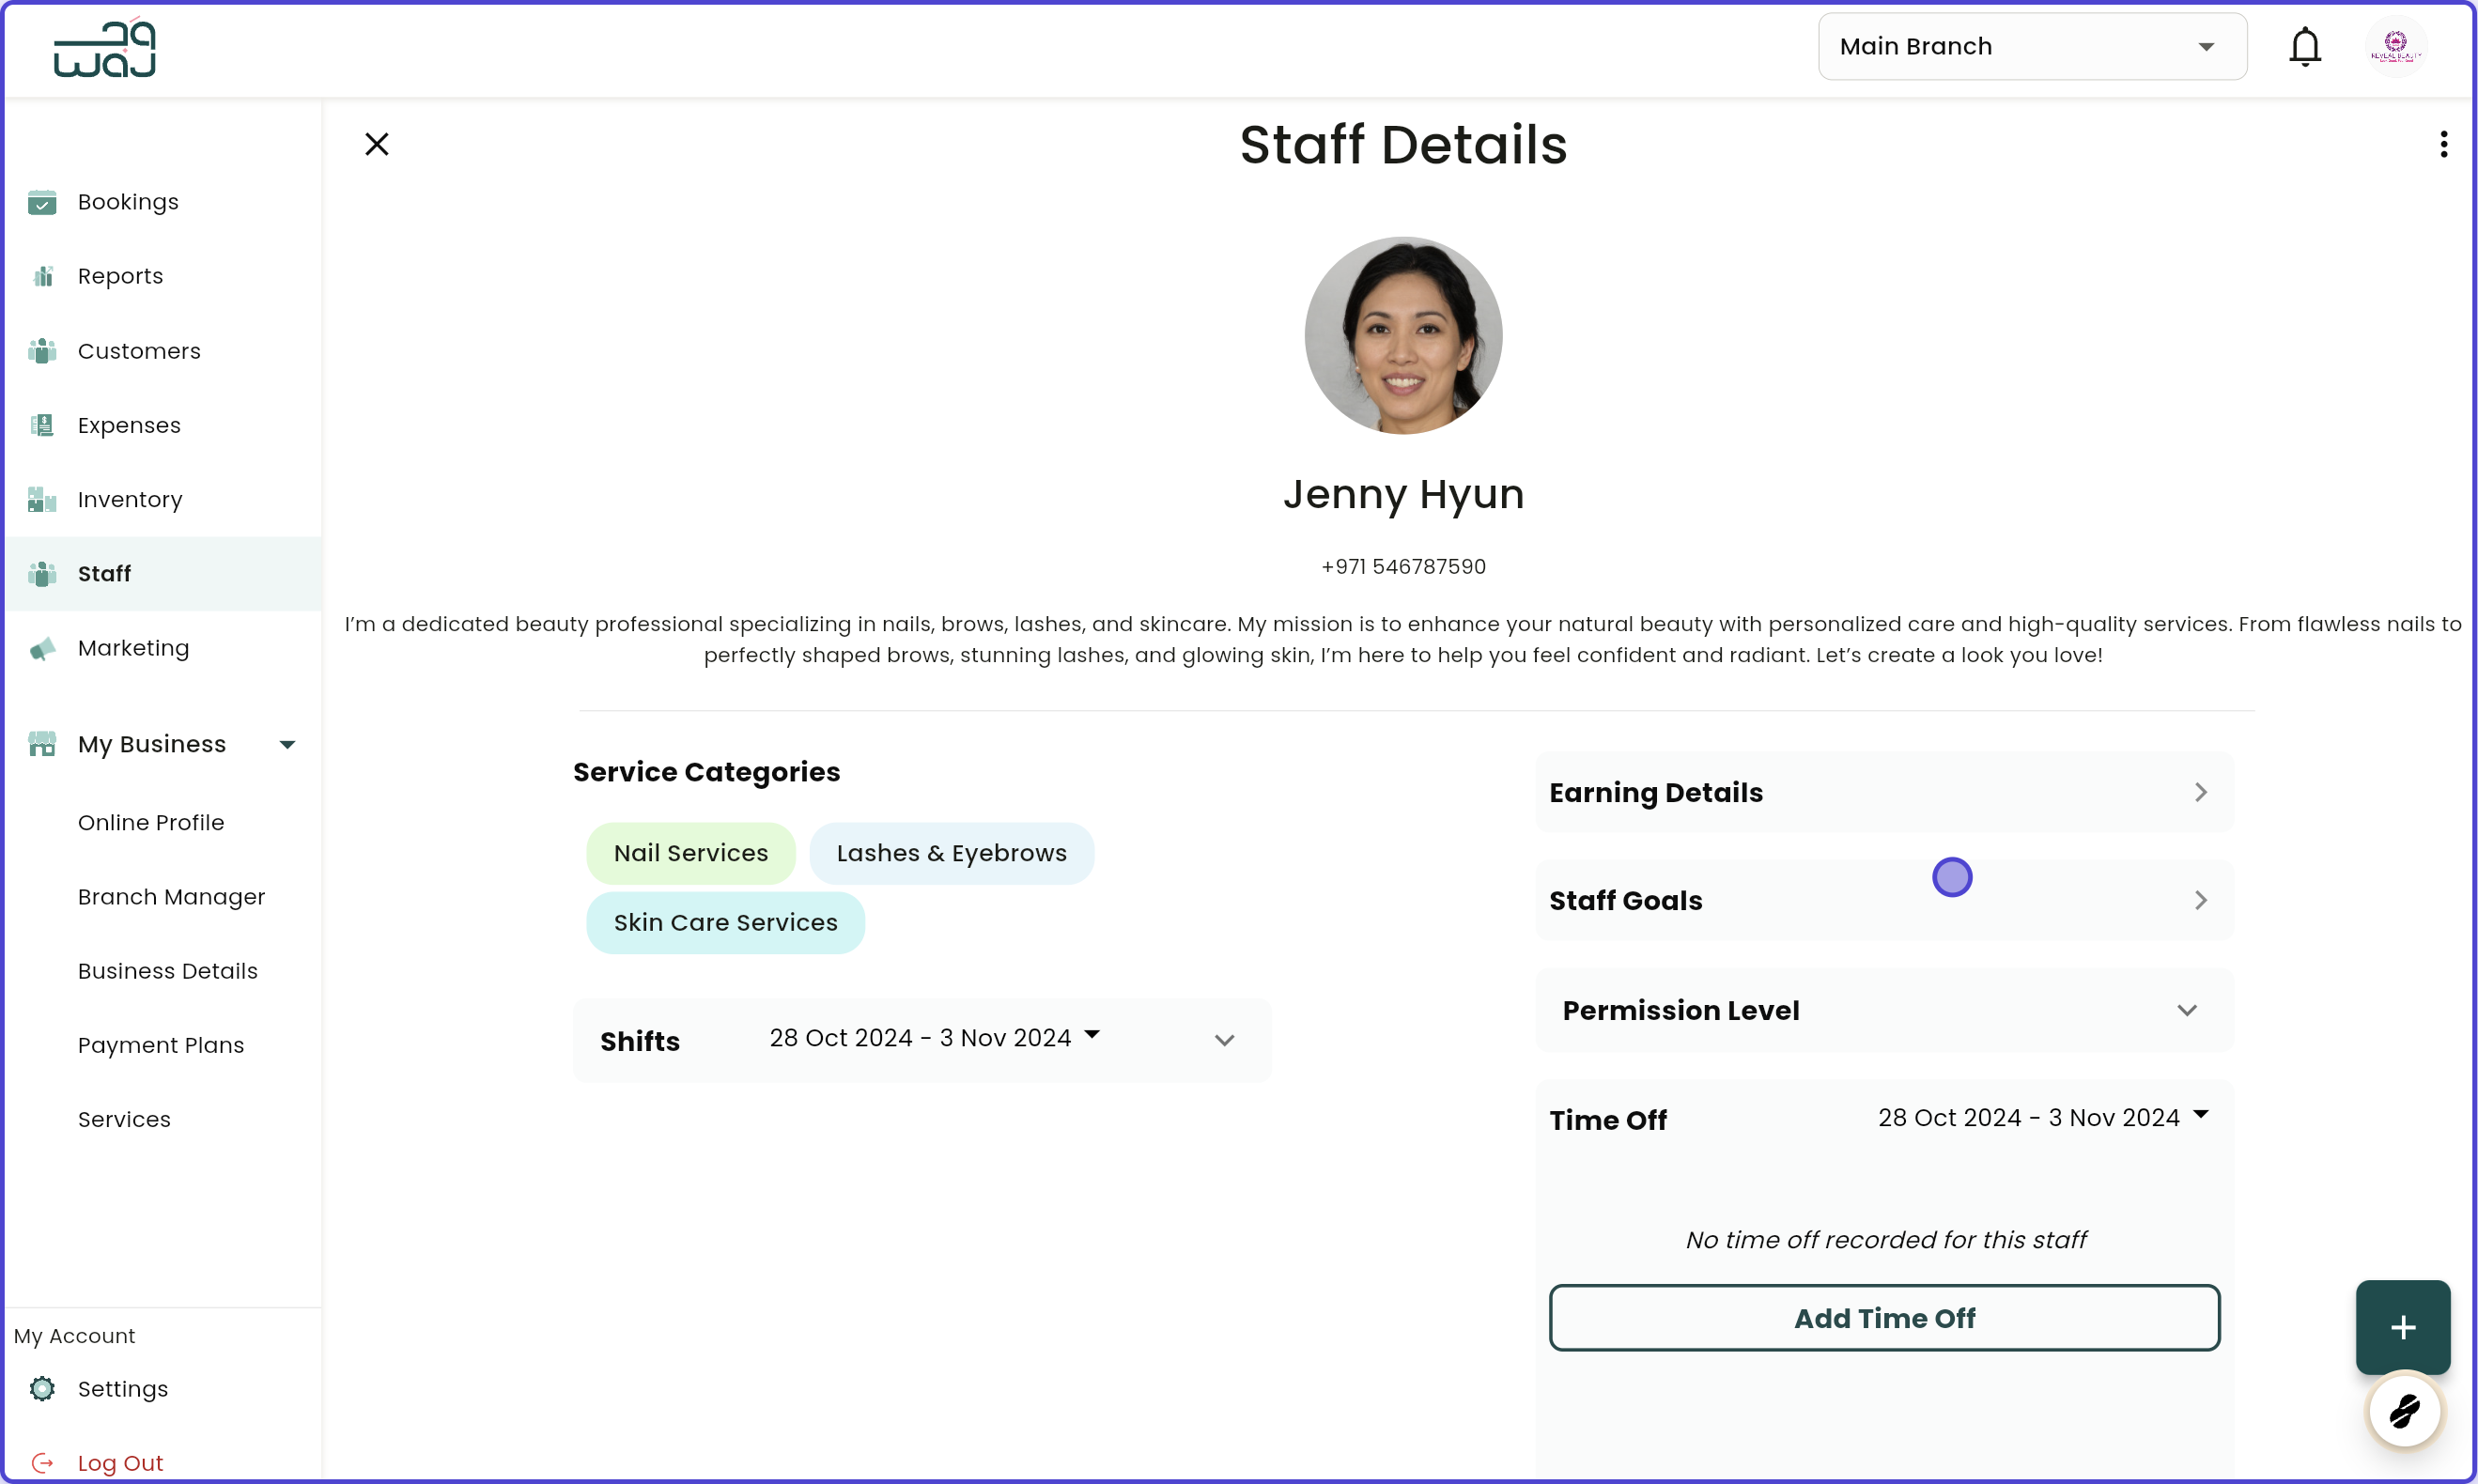
2. Viewing Staff Details
Steps:
Click on any staff member from the list
View detailed information organized into sections:
Profile: Photo, name, phone, about
Payment Methods: Accepted payment types
Services: Assigned service categories
Earnings: Staff earning details (requires permission)
Goals: Staff performance goals
Shifts: Shift management (requires permission)
Permissions: Staff access level
Time Off: Time-off history and requests
3. Editing Staff Information
Permissions Required: "Edit staff details"
Steps:
Navigate to the staff member's detail screen
Click the Edit icon next to the staff name
Make desired changes:
Update name, phone, email
Change role
Add/remove branches
Update service categories
Change payment methods
Update profile photo
Modify about section
Click Save to apply changes
What You Can Edit:
Profile photo (tap on photo)
Staff name (tap on edit icon)
Phone number and email
Role
Branch assignment
Service categories
Payment methods
About/bio
4. Deleting a Staff Member
Permissions Required: "Delete staff profile"
Steps:
Navigate to the staff member's detail screen
Click the Delete button in the top right
Confirm deletion in the dialog
Note: Deleting a staff member soft-deletes them (marks them as inactive). You can reactivate them later if needed.
5. Reactivating a Deleted Staff Member
Steps:
Go to Settings > Deleted Staff (if available)
Find the staff member you want to reactivate
Click Reactivate
Confirm reactivation
6. Managing Service Assignments
Permissions Required: "Assign service to staff member"
Steps:
Navigate to the staff member's detail screen
Scroll to the Services section
Click Edit next to services
Select/deselect service categories:
Check the categories this staff provides
Uncheck categories they don't provide
Click Save to update assignments
What This Affects:
Booking availability for this staff member
Which services appear in the booking screen
Staff scheduling for specific services
7. Managing Payment Methods
Steps:
Navigate to the staff member's detail screen
Scroll to the Payment Methods section
Click on the payment methods field
Select/deselect payment methods:
Cash
Card
Other configured methods
Click Save to update
What This Affects:
Which payment options show for this staff during checkout
Payment processing capabilities for this staff
8. Setting Staff Goals
Permissions Required: "Access staff goals"
Steps:
Navigate to the staff member's detail screen
Click on the Goals section
Configure goals:
Goal Type: Choose either "Bookings" or "Revenue"
Interval: Choose "Weekly" or "Monthly"
Goal Amount: Enter the target number
Click Save to set the goal
Examples:
50 bookings per month
$5,000 revenue per week
100 bookings per quarter (track weekly)
Removing Goals:
Navigate to goals section
Click the delete/remove button
Confirm removal
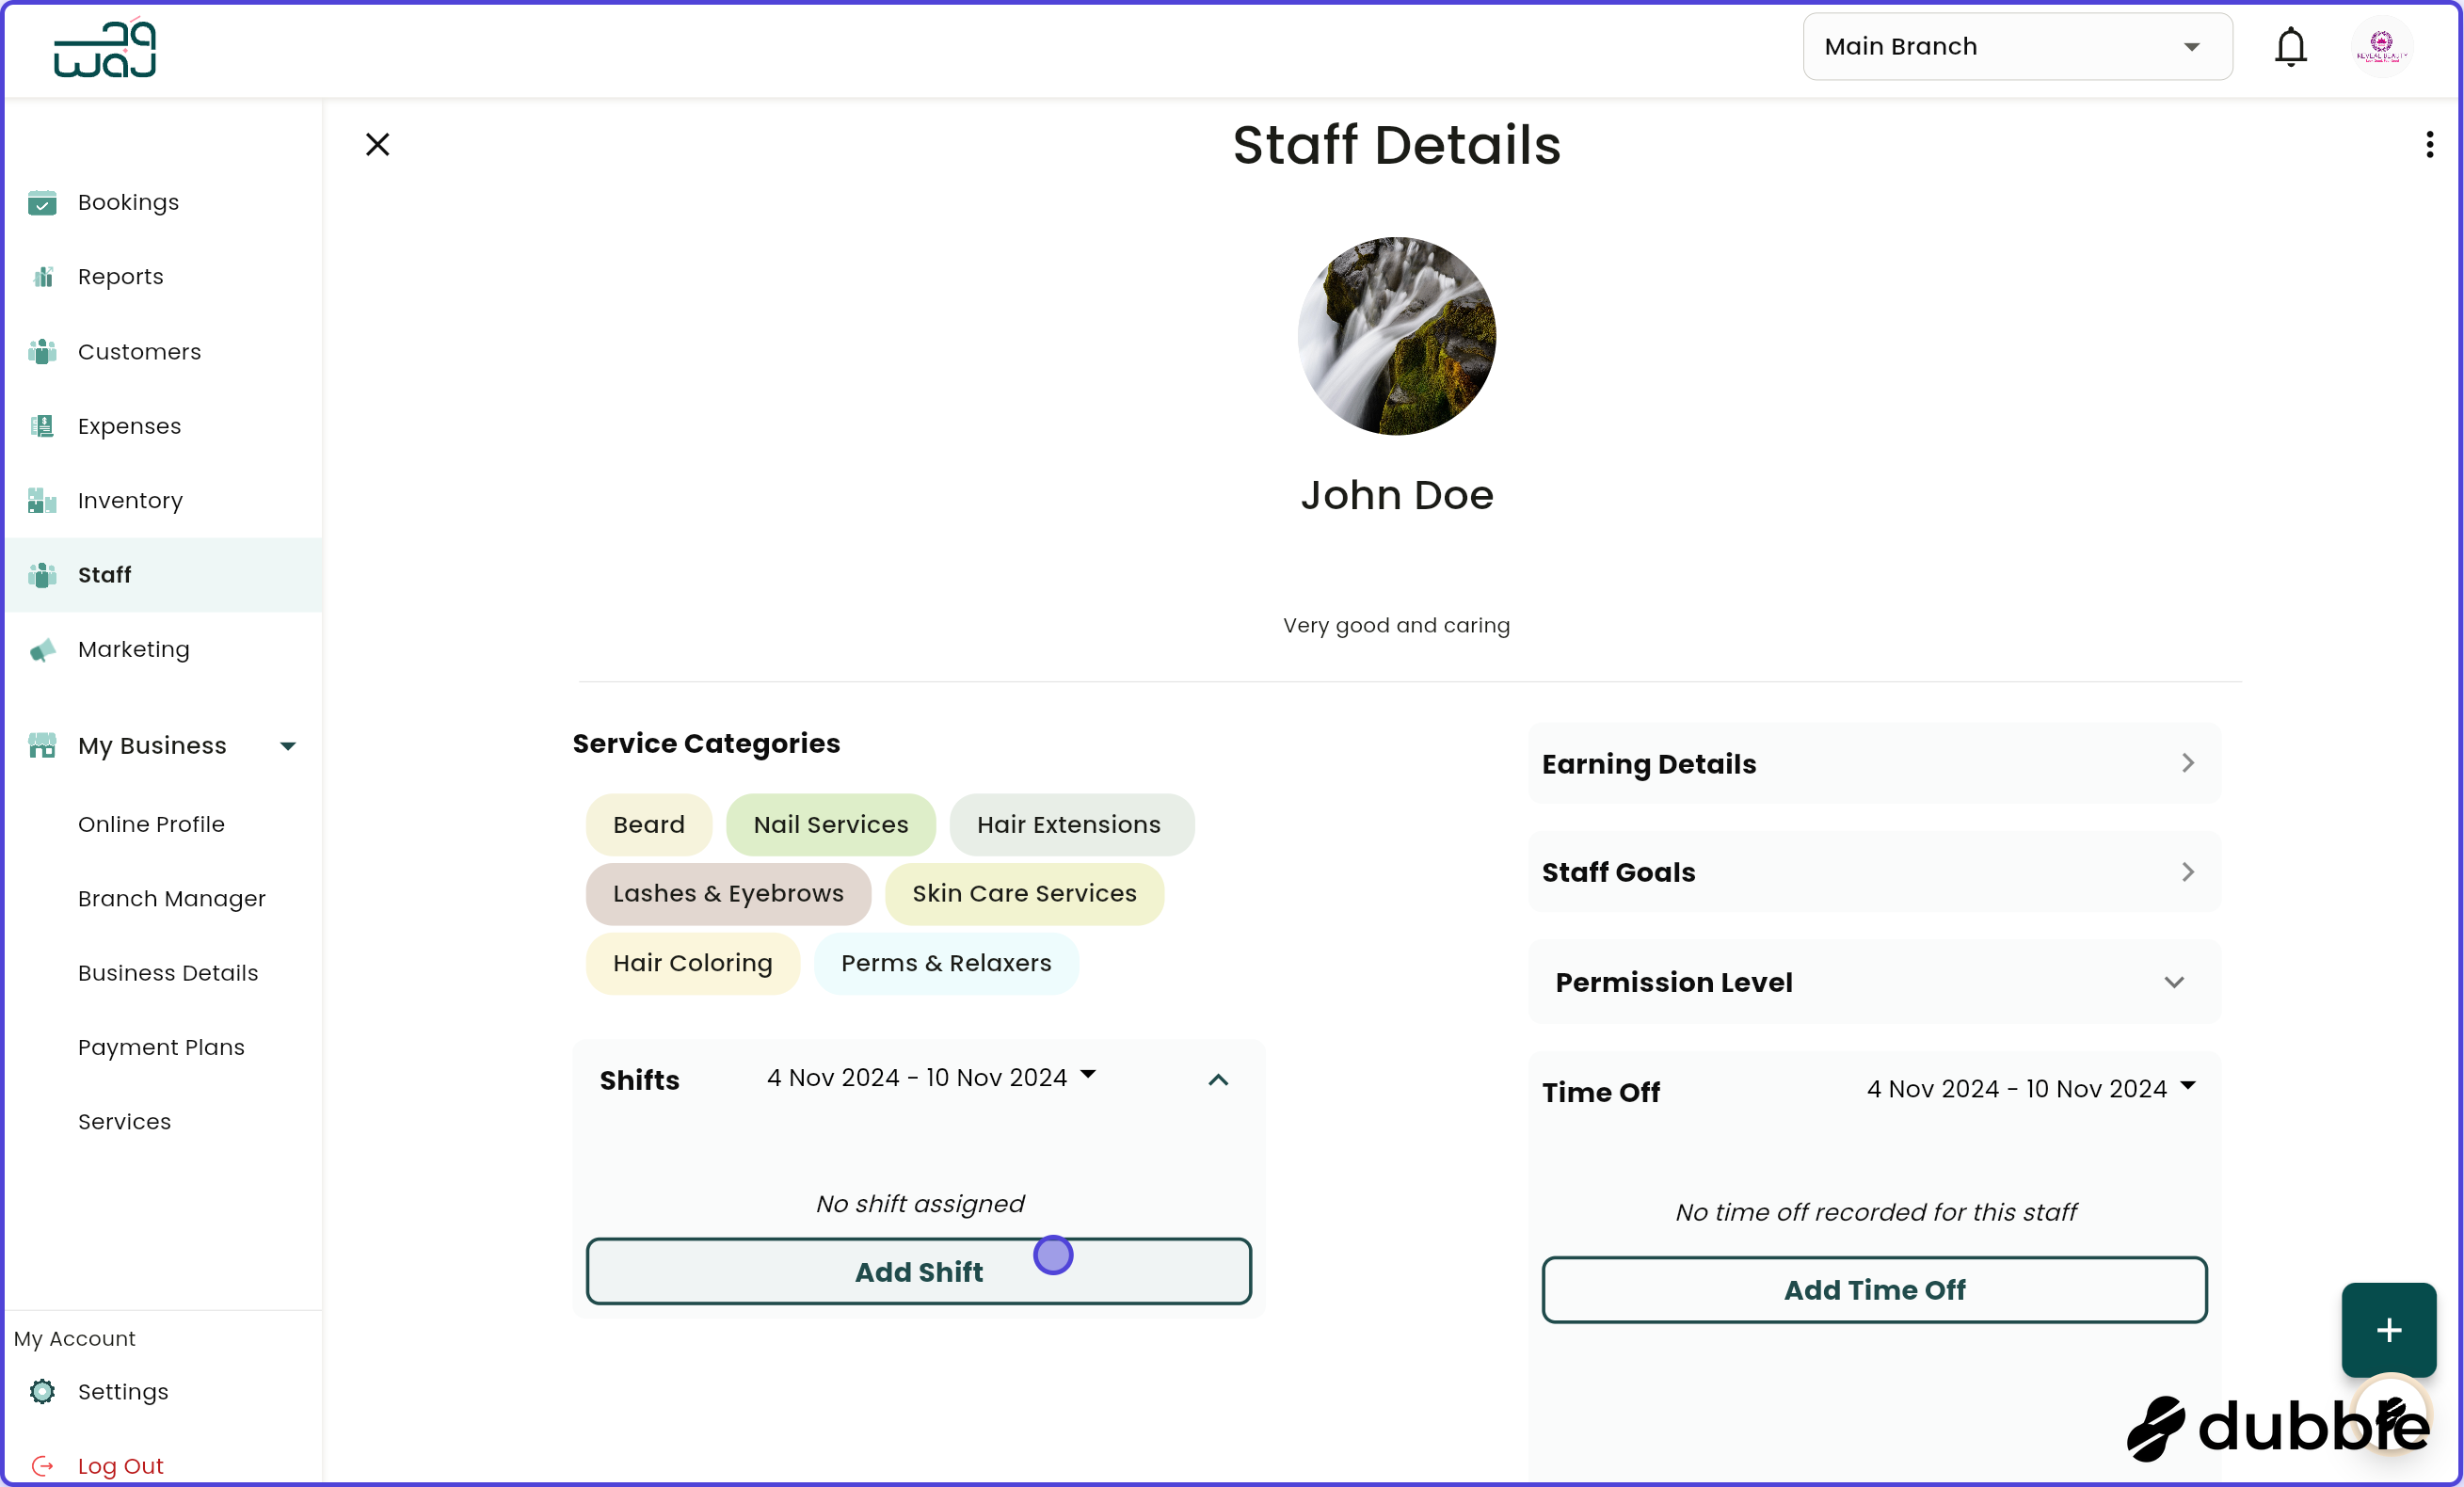
9. Managing Staff Shifts
Permissions Required: "Assign shifts"
Accessing Shifts:
Navigate to the staff member's detail screen
Click on the Shift Management section
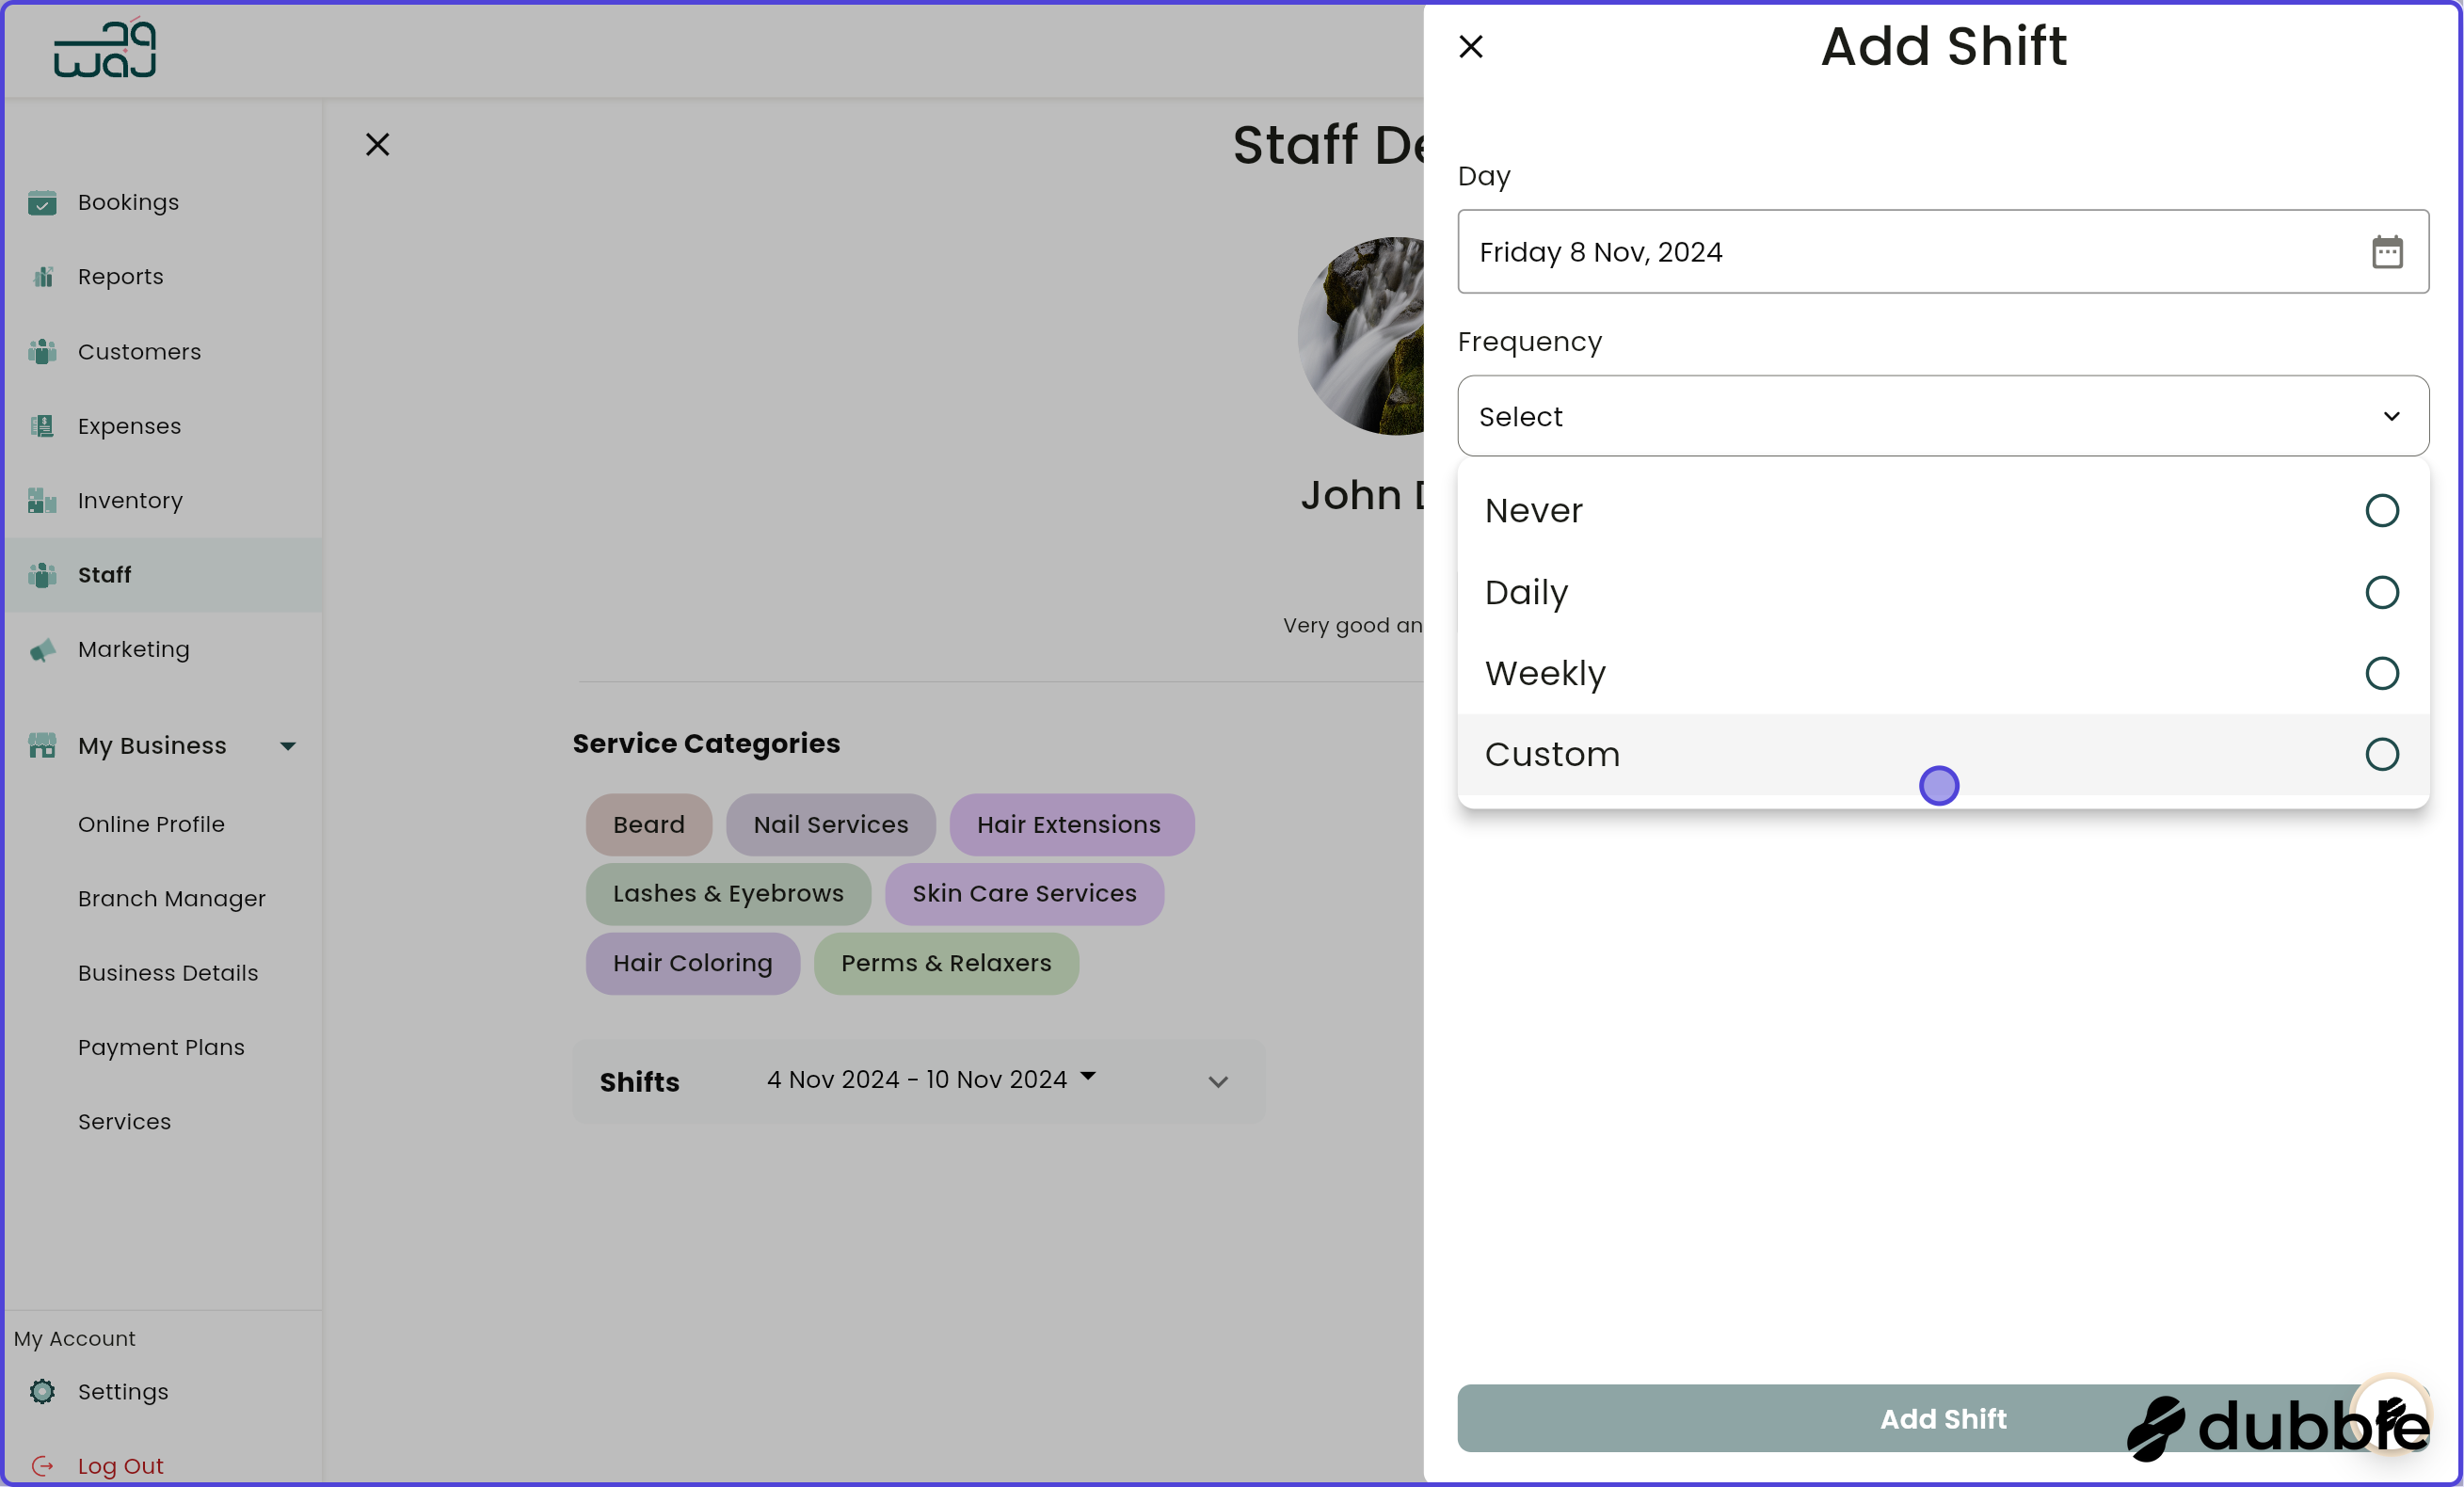
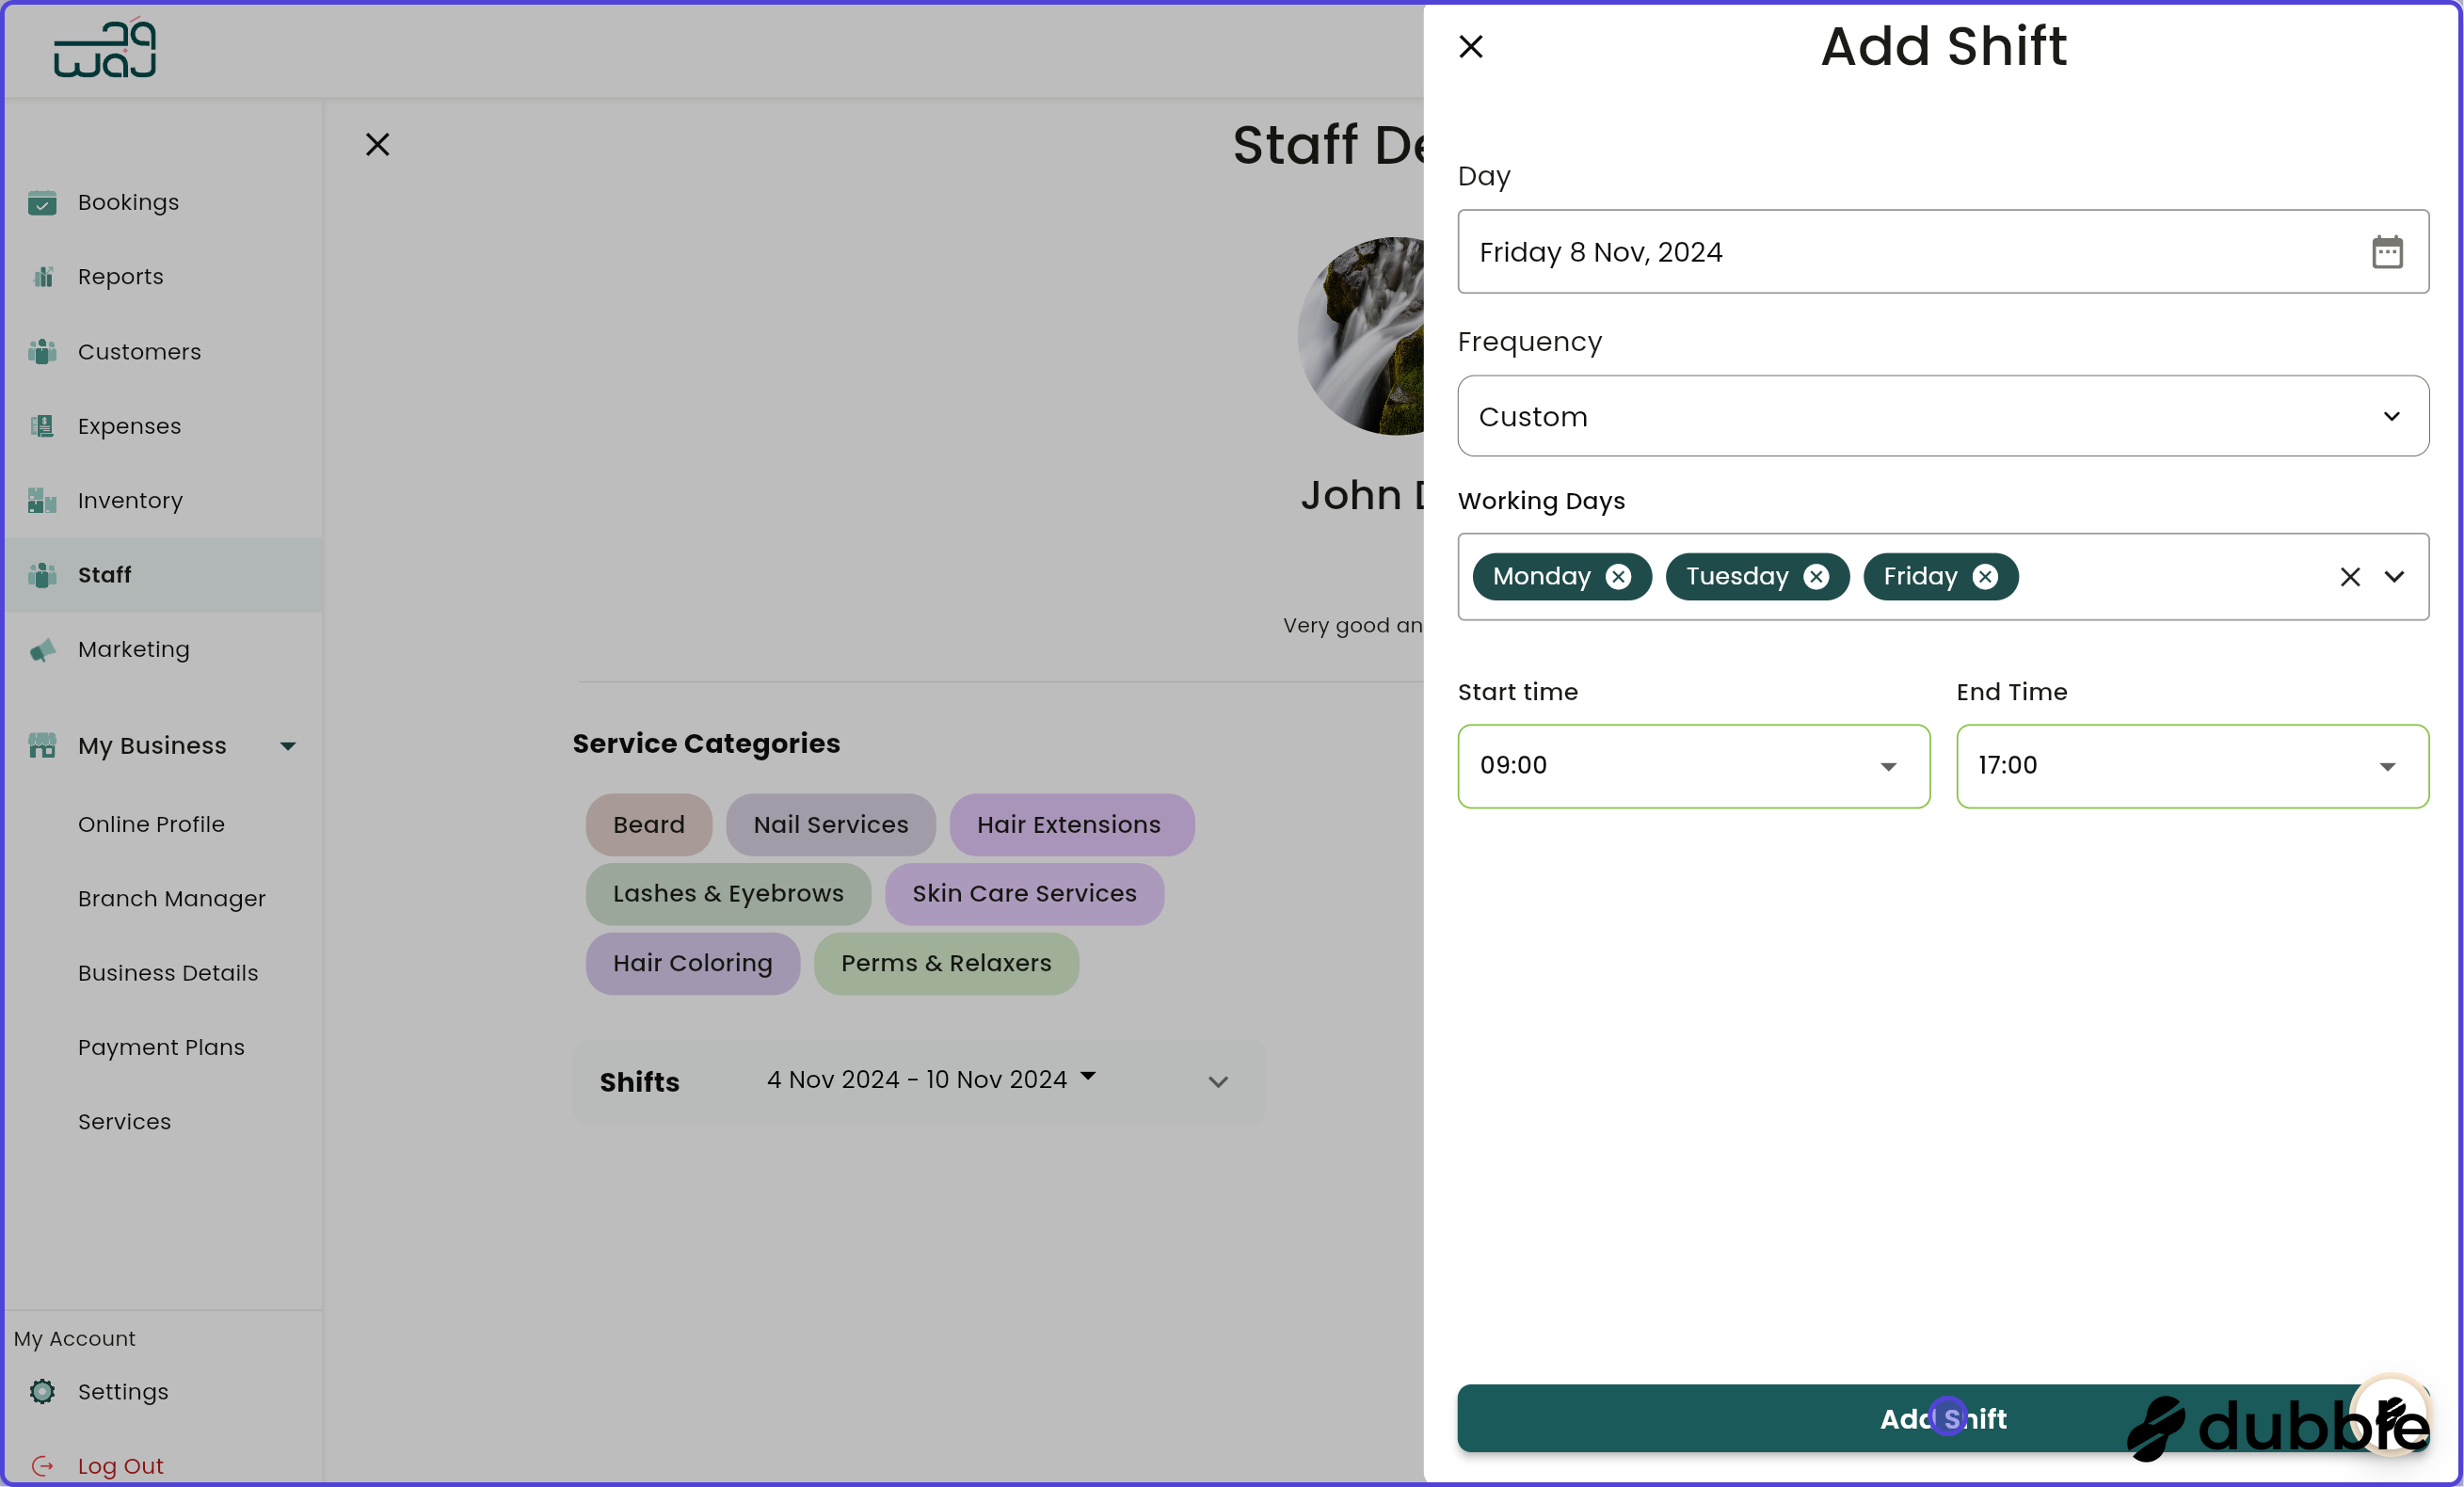
Adding a Shift:
Click Add Shift
Set shift details:
Date: Select the date
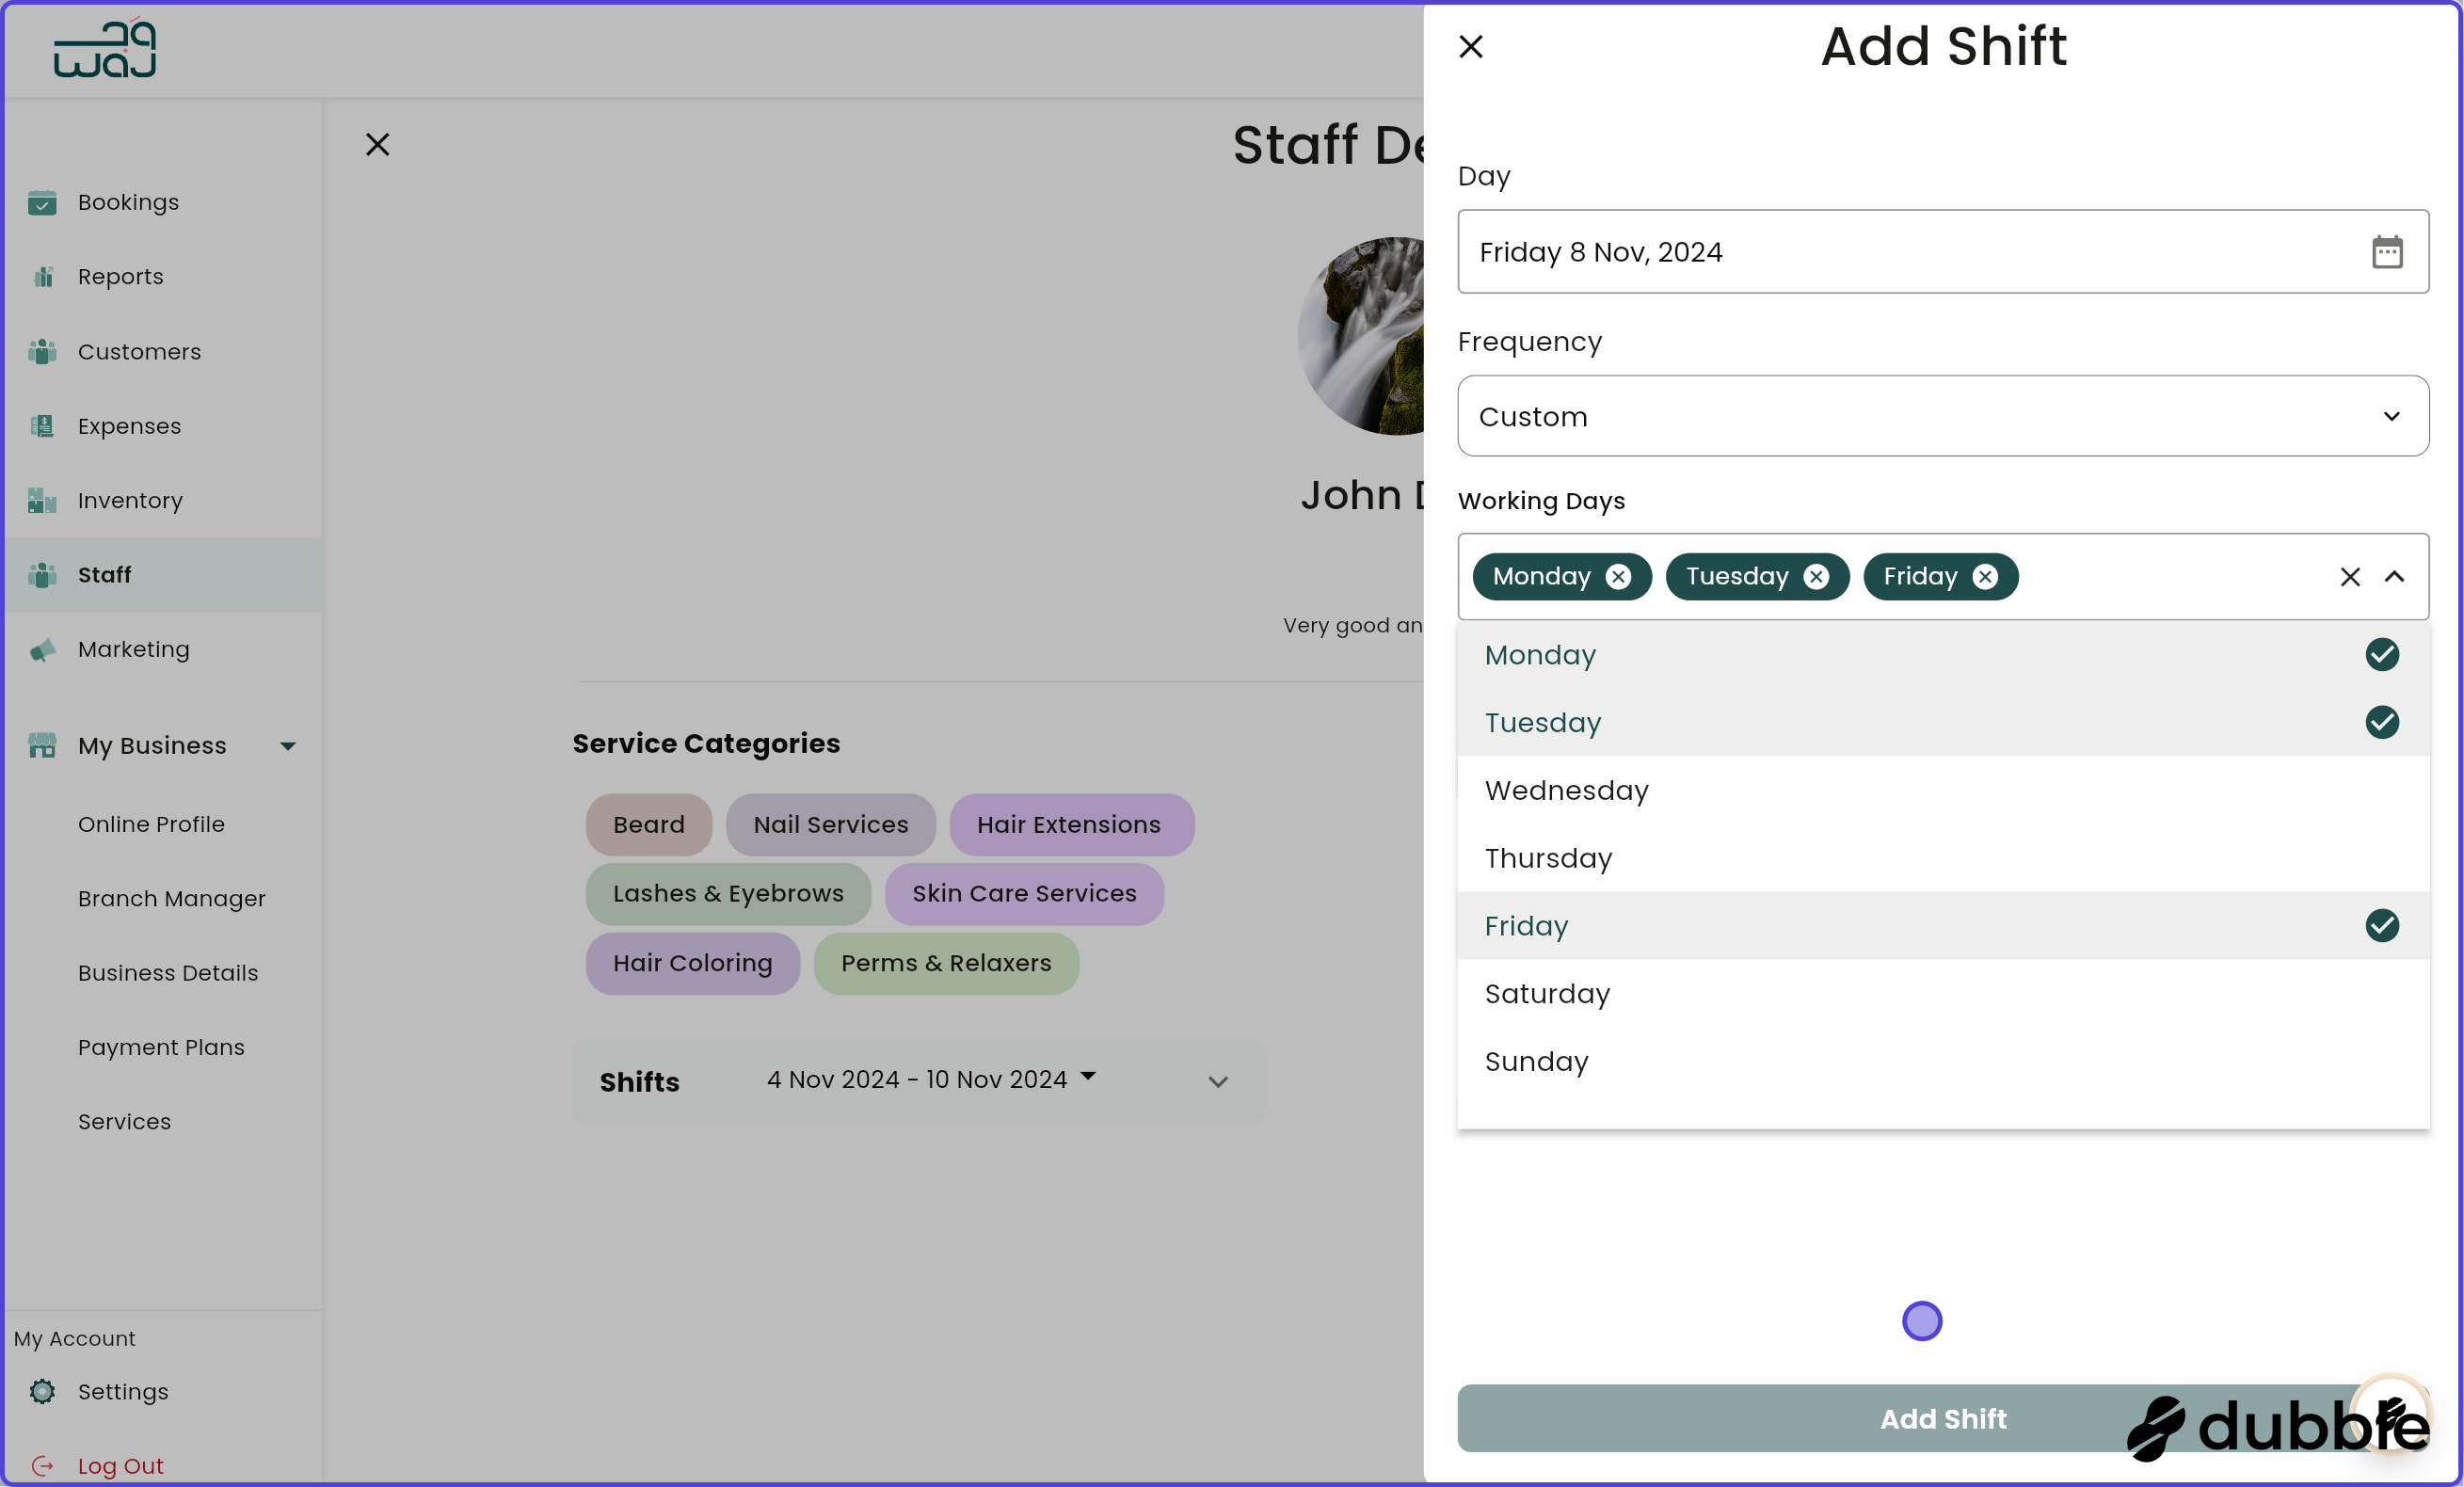
Frequency: Choose shift pattern:
Never: Single shift
Daily: Every day
Weekly: Recurs weekly
Custom: Choose specific days
Start Time: When the shift begins
End Time: When the shift ends
Click Save
Editing a Shift:
Click on the shift to edit
Modify time or frequency
Save changes
Deleting Shifts:
Click on the shift to delete
Choose deletion option:
Delete this shift only: Removes single occurrence
Delete shifts between dates: Removes multiple shifts
Delete all recurrent shifts: Removes all matching patterns
Confirm deletion
Viewing Calendar:
Toggle between list and calendar view
Filter by week/month
See shift status (pending, in progress, finished, no-show)
10. Managing Staff Permissions
Steps:
Navigate to the staff member's detail screen
Scroll to the Permissions section
Select permission level:
Low: Basic staff access (view own schedule)
Medium: Limited management access (manage own bookings)
High: Full management access (manage all bookings, staff, etc.)
Save to apply changes
Permission Levels Explained:
Low:
View own schedule
Clock in/out
View own bookings
Medium:
All Low permissions
Edit own bookings
Cancel bookings
View staff schedules
Manage bookings
High:
All Medium permissions
Edit staff profiles
Manage staff permissions
Access all reports
Full system access
11. Managing Time Off


Accessing Time Off:
Navigate to the staff member's detail screen
Scroll to the Time Off section
Requesting Time Off:
Click Add Time Off
Fill in details:
Category: Choose time-off type (e.g., Vacation, Sick Leave)
Start Date: When time off begins
End Date: When time off ends
Start Time: If partial day, set start time (optional)
End Time: If partial day, set end time (optional)
Note: Add any additional information (optional)
Click Save
Editing Time Off:
Click on the time-off entry
Modify dates, times, or notes
Save changes
Deleting Time Off:
Click on the time-off entry
Confirm deletion
Filtering Time Off:
Use date range filters
View time off for specific periods
Clear filters to see all records
12. Viewing Staff Earnings
Permissions Required: "View staff earning details"
Steps:
Navigate to the staff member's detail screen
Click on the Earnings section
View earnings breakdown:
Total earnings
Earnings by period
Breakdown by service
Payment method distribution